
How to Install dotGate and Locking Mechanism?
Congratulations on your purchase of a robotic lawn mower. With dotGate you will be able to mow your lawn across your fence without any manual intervention. Please follow the steps described here for a proper installation.
What's included in the box?
- dotGate
- Mounting Hardware
- Metal Flanges (For metal fences)
- Lock and all accessories (if purchased with a lock)
Recommended Installation Tools:
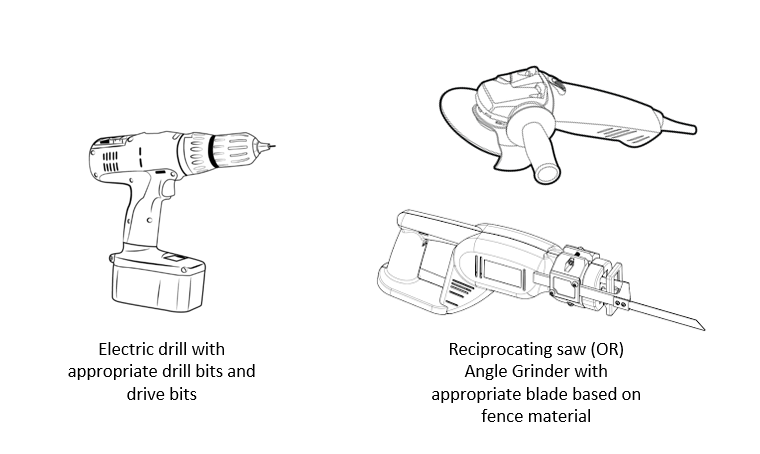
PREPARATION
Remove the dotGate assembly from the box and ensure that the doors are opening and closing when manually pushed with the hand. Ensure that the frame is not bent or damaged. If any issues are observed out of the box, then please send us an email at support@smart-dots.com
INSTALLATION IN WOODEN FENCES
STEP 1: Choosing the right location for the gate
The following should be considered while choosing the location for installation of the dotGate,

STEP 2: Measure the dotGate dimensions and mark on the fence
The dimensions of the inner frame of dotGate are shown in the image below in mm(millimeters). It is recommended to keep a margin of +0.5” for the width and about +1-4” for the height (depending on the mower model that is being used).
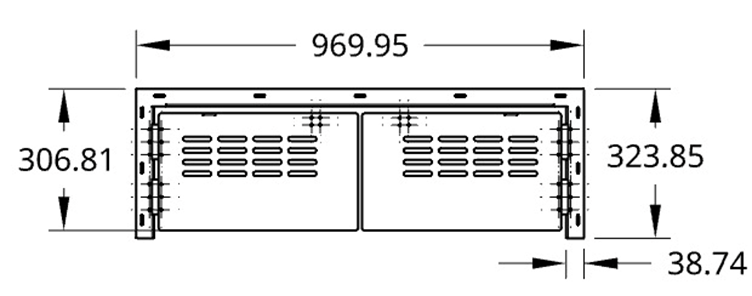
The size of opening can be ~ 36.75” X 13.5” , which will provide some margin for the gate to slide in easily and also provide enough clearance on the bottom for it to open and close without any obstruction.
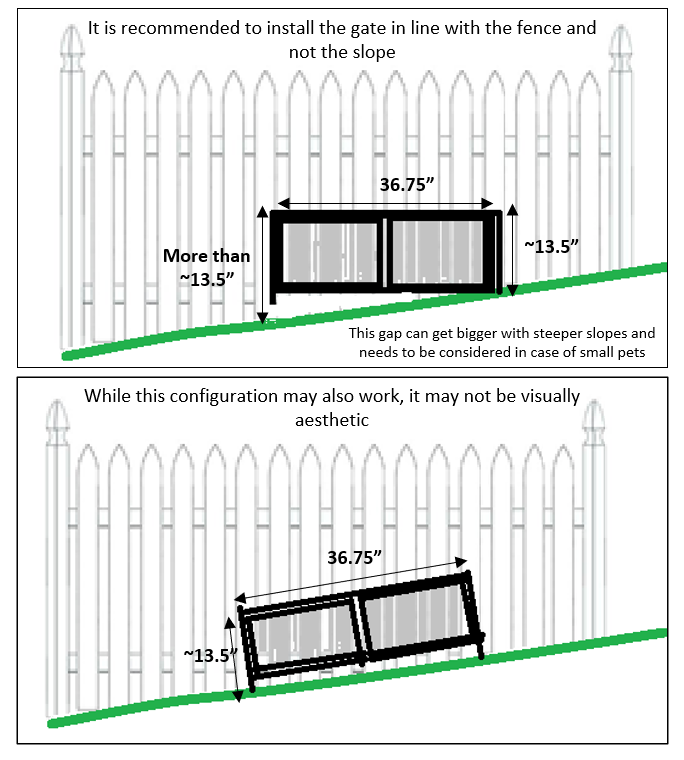
STEP 3: Measurement/Installation in sloping areas. Refer to this only when the fence is located on a sloping landscape
SCREWS/ACCESSORIES TO USE
dotGate 5.0 comes with all the accessories needed to install the gate. Below are the screws and accessories to use for installation of the gate,
Metal Fence:
Metal Flanges – 4 Pieces
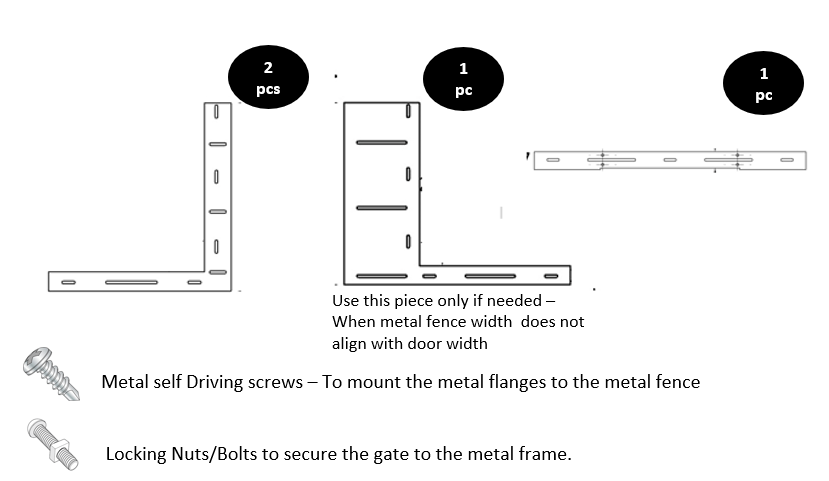
Wooden Fence:

INSTALLATION IN CHAINLINK FENCES
Materials & Tools Required: Quick Set Concrete Mix, Shovel, Bolt Cutter, Pliers,Philips Screw Driver (Not Provided with the purchase of the gate and/or lock)
For chain link fence, special flanges are required to install the gate. These flanges can be purchased from SmartDots. To order flanges for chainlink fence, please send a request to support@smart-dots.com
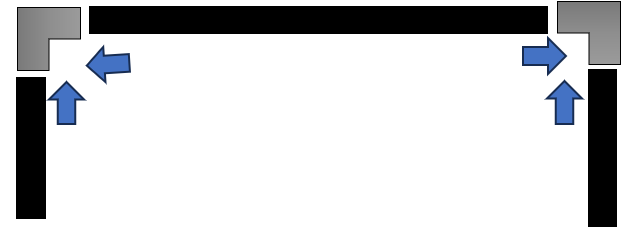
STEP 1: Put together the flange frame using the chain link fence flange kit (purchased separately) . Use the metal self drilling screws to secure the flanges to the right-angled elbow.
Ensure that you assess the length of the horizontal bar against the door frame and secure the flange accordingly. Use a mallet or hammer to push the rod in the elbow joint.
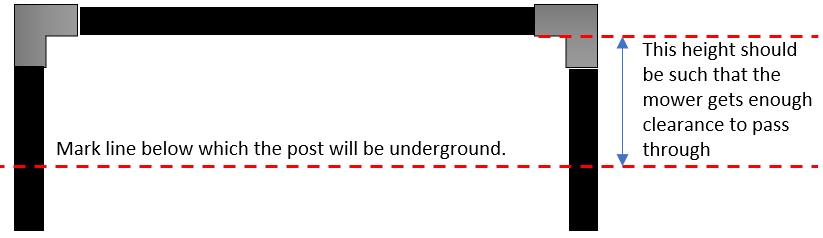
STEP 2: On the vertical flanges, mark the point, until where the frame will have to sit above ground, based on measurement of the mower height. Ensure that you leave about 1-2 inches of clearance below the gate as well.
TIP: Place the gate on the flange assembly to make sure the assembly is accurate – Adjust such that the gate fits perfectly in the flange frame without being too tight. This can also be a good time to use self drilling screws to pre-drill the holes for securing the gate to the flange frame assembly.
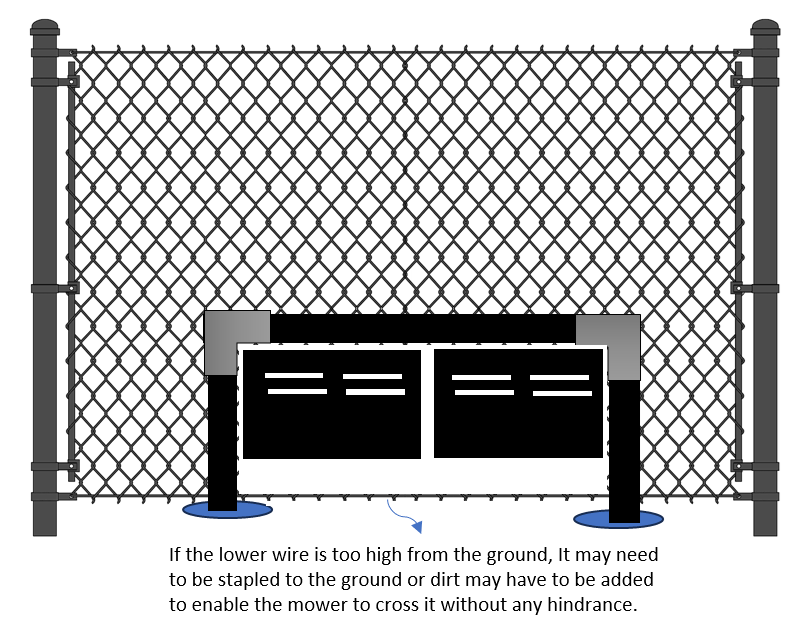
STEP 3: Using the vertical flanges as posts, dig two holes at least 6 inches deep and about 4-6 inches wide in the ground where the gate is to be installed. The holes should be made on the side of the fence which will be on the opposite side of the front facing side of the gate. The holes should be as close as possible to the fence . Refer to the image below,
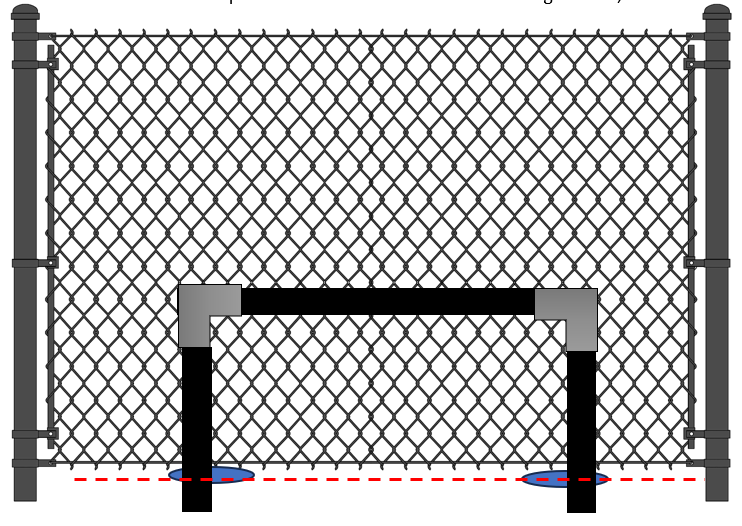
STEP 4: Ensuring that the vertical posts of the flange are not deeper than the line marked in Step 2, place the flange assembly in the holes and use a level to ensure it is perpendicular to the ground. The horizontal flange should be parallel to the ground [In sloping areas the flange can wither be installed parallel to the ground or along the slope of the ground, depending on your preference]. Ideally, after installation the flange frame should be in contact with the chain link fence, without pushing the fence out too much.
STEP 5: While the posts have been placed in the hole and are held in place with some support, pour some quick setting concrete in the holes, all the way to fill up the hole, in level with the ground. Then add water to the concrete as per the instructions on the quick setting concrete.
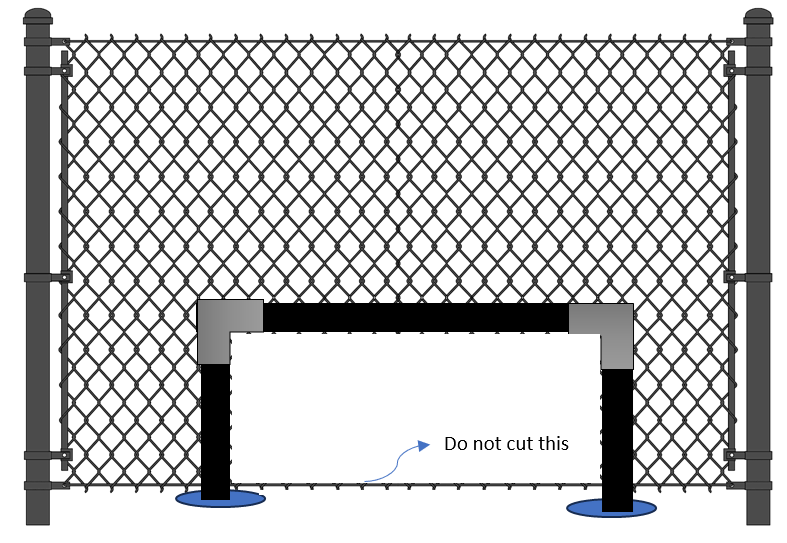
STEP 6: Once the concrete is set, use the inner edge of the flange as a reference and cut out the chain link fence using a tool such as a bolt cutter.
Important: DO NOT cut the holding wire at the bottom of the fence as this will cause the fence to lose its tension.
STEP 7: Now place the gate over the flange assembly and align the mounting holes of the gate with the holes pre-drilled in STEP 2 [If holes were not pre-drilled, then the self drilling metal screws can be used now to secure the gate to the flange frame]
Ensure that the chain link fence gets sandwiched between the gate and the flange assembly.
STEP 8: Once installed, install the mower as per guidelines shown in the document and test the mower .
GUIDELINES FOR WIRE INSTALLATION AND MOWER SET UP
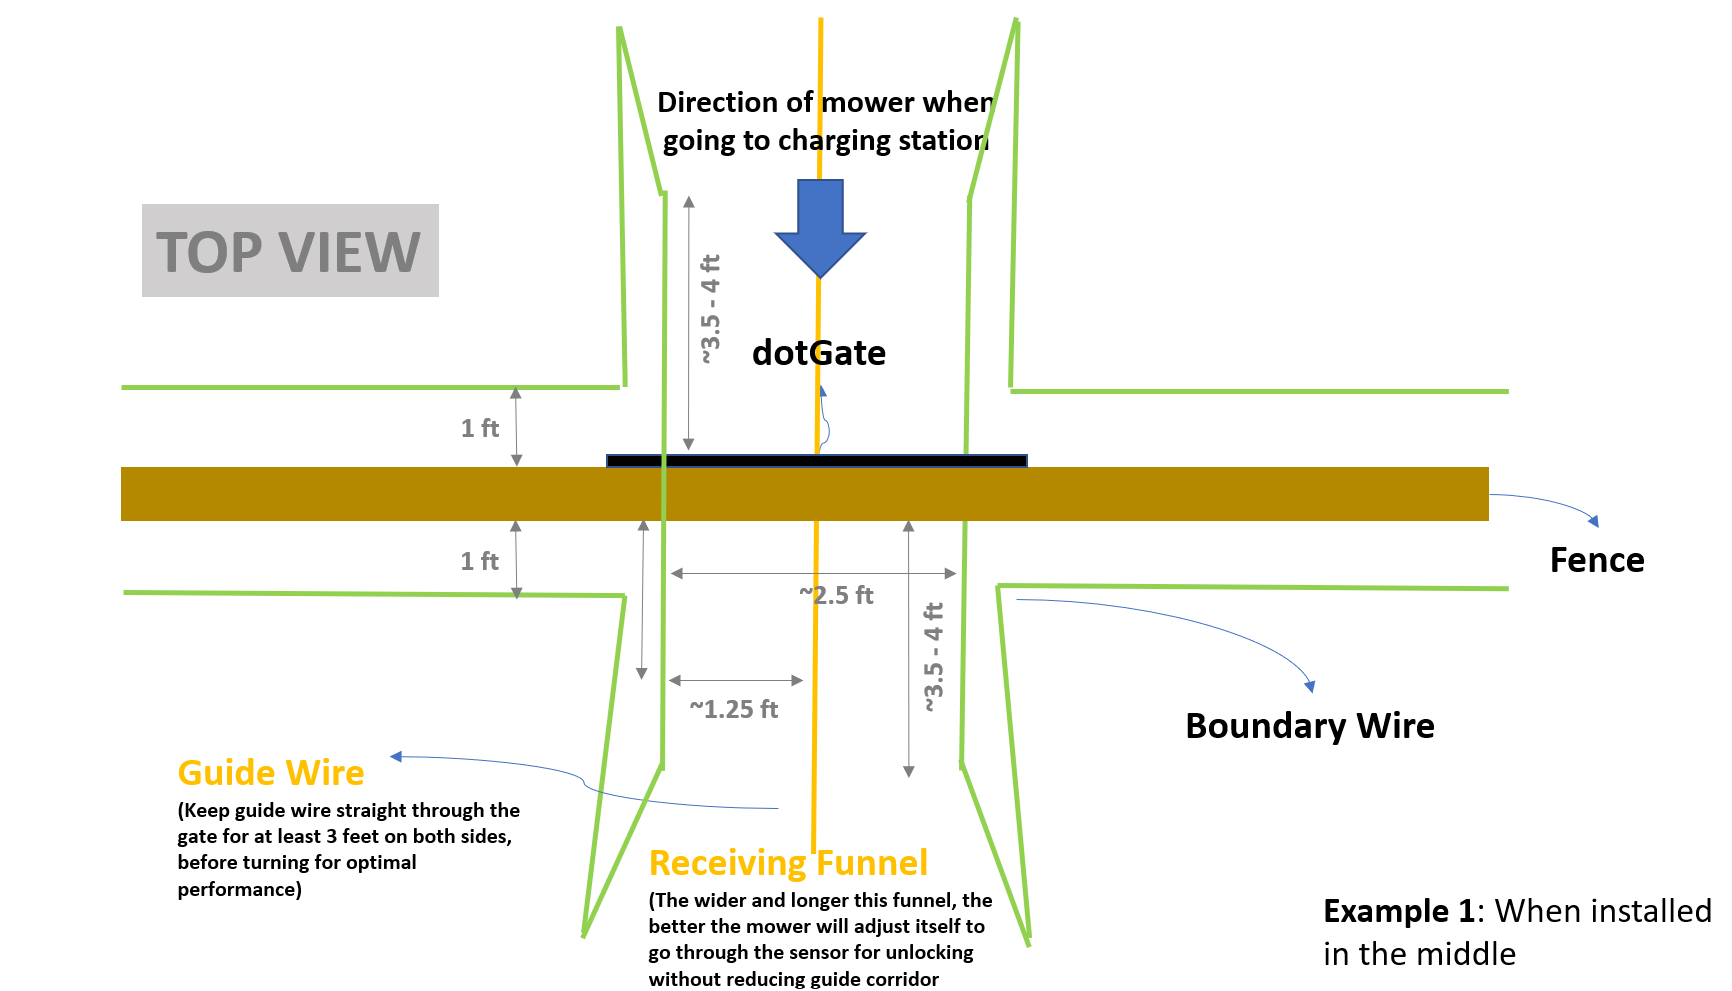
SETUP FOR HUSQVARNA WIRED MOWERS (When the gate is installed in the middle of the fence)
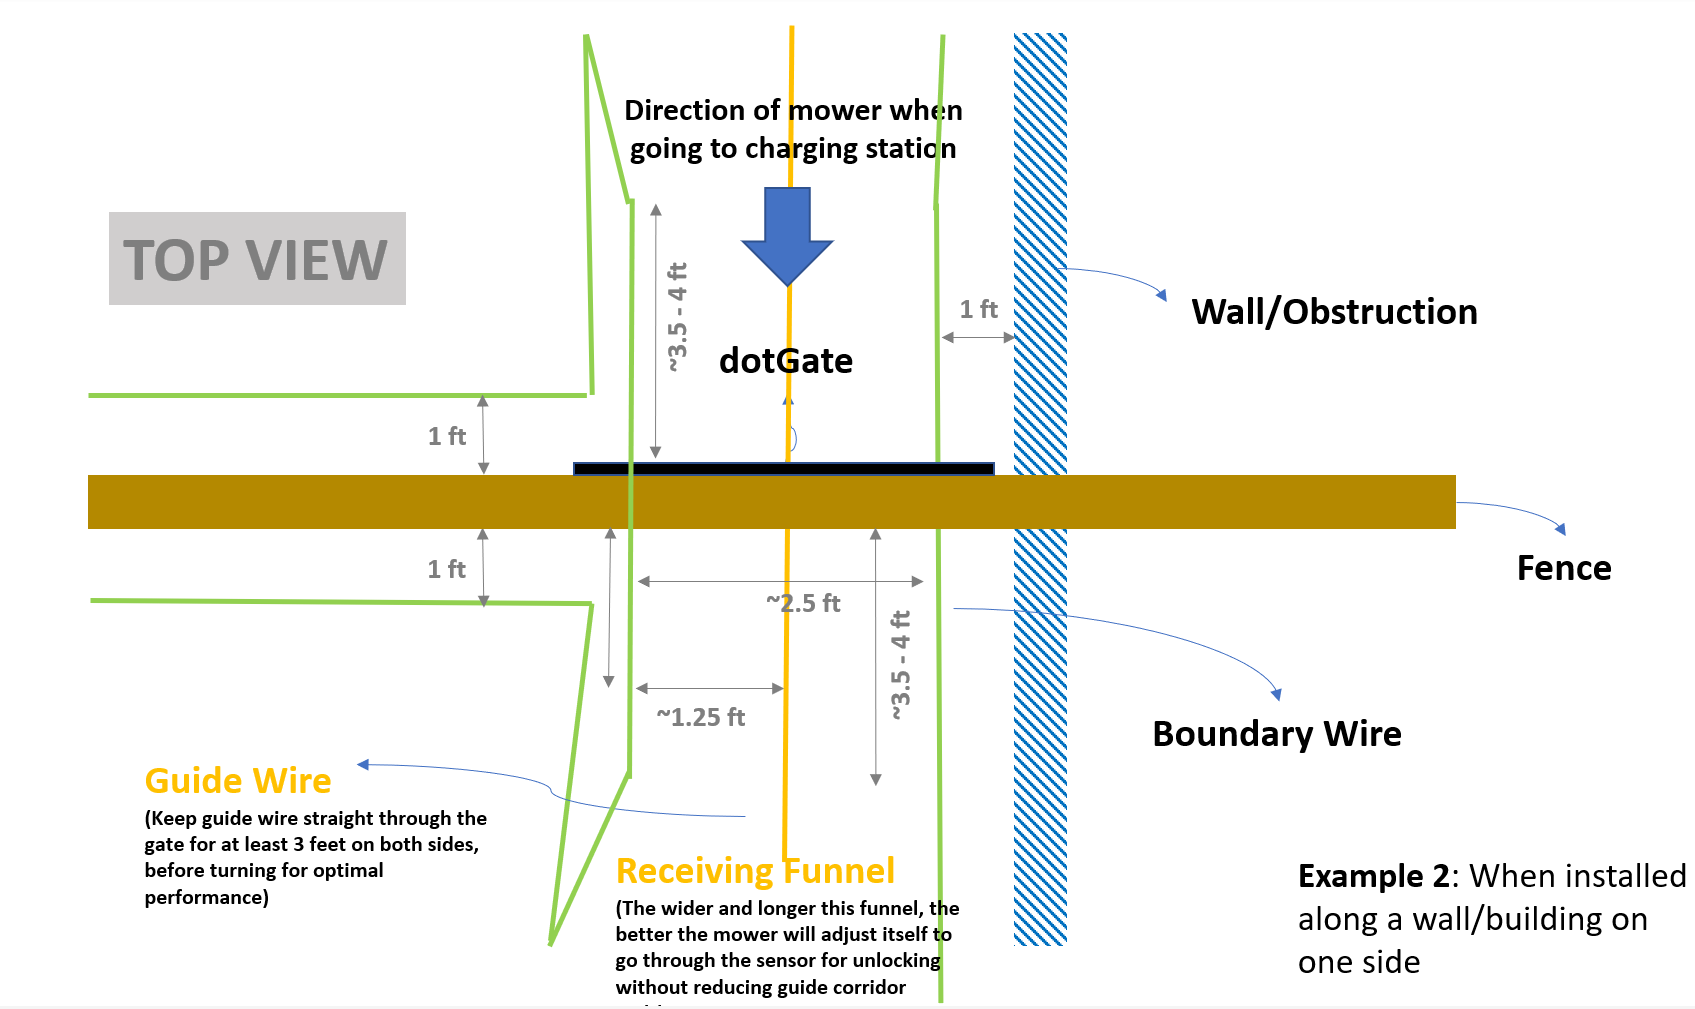
SETUP FOR HUSQVARNA WIRED MOWERS (When the gate is installed near a wall/barrier)
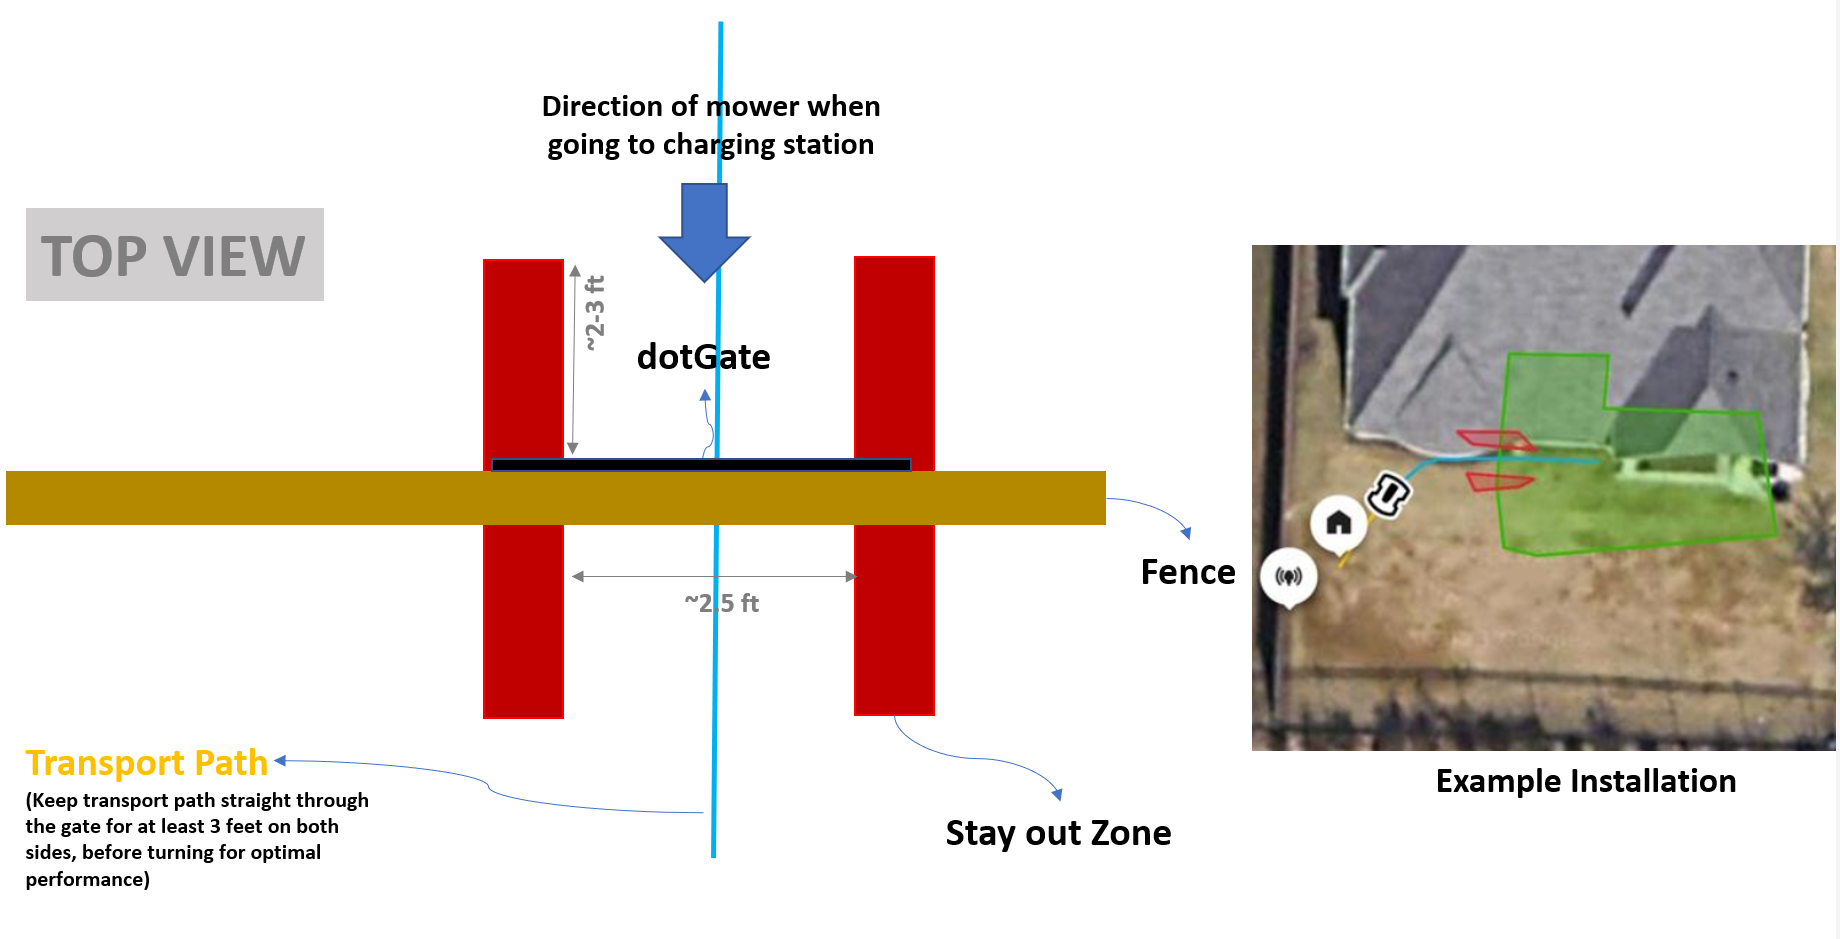
SETUP FOR HUSQVARNA EPOS MOWERS
VIDEO FOR INSTALLATION OF LOCKING MECHANISM
VIDEO FOR INSTALLATION OF GATE ON WOODEN FENCE
VIDEO FOR INSTALLATION OF GATE ON WOODEN FENCE